![]() 1. Introduction
1. Introduction
This guide explains how to create your own training dataset by labeling images so they can be used to train AI/ML models.
The guide provides step-by-step instructions on how to:
- Open and access the image labeling tool.
- Choose the appropriate label types for different solar features.
- Apply labels manually by clicking on image segments or use the automatic labeling option.
- Review the labeled images and adjust them if needed.
- Save and verify the labeled data so that it can be used for further training purposes.
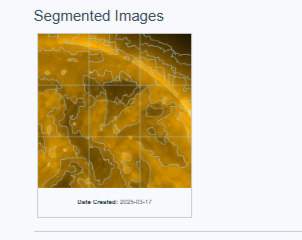
![]() 2. Creating your own Training Dataset
2. Creating your own Training Dataset
Before downloading the dataset, you need to label the images so that they can be used for training purposes.
![]() 2.1 Open the Labelling Tool
2.1 Open the Labelling Tool
- Sign in to the Training Dataset Labeling Tool using your credentials.
- Click on the Images button to access the available datasets.
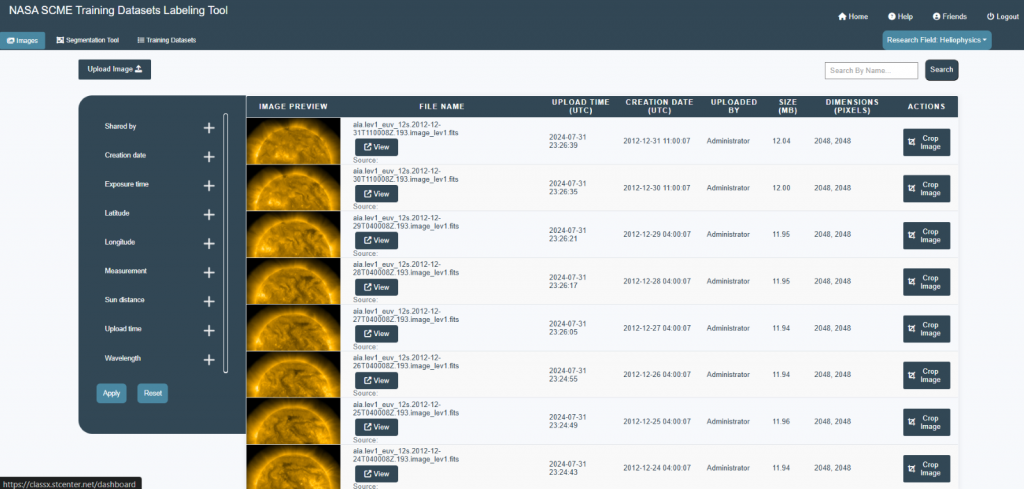
- Select the image dataset that you want to label.
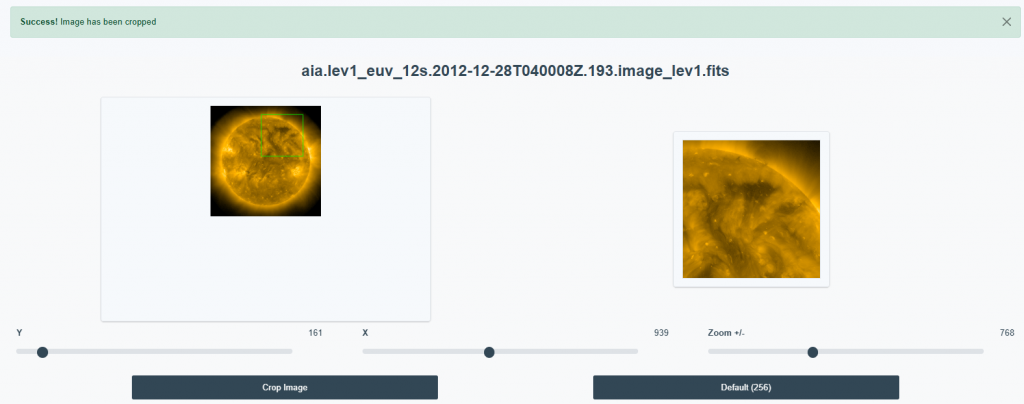
- Click on the Crop Image button next to the selected dataset.

- Adjust the X, Y, and Zoom sliders to define the cropped area of your region of intrest.
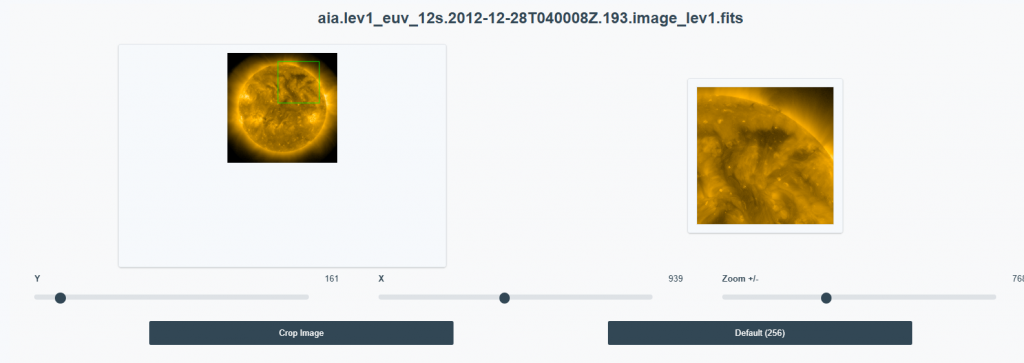
- Click Crop Image to finalize the cropped selection.
![]() 2.2 Choosing the Type of Label
2.2 Choosing the Type of Label
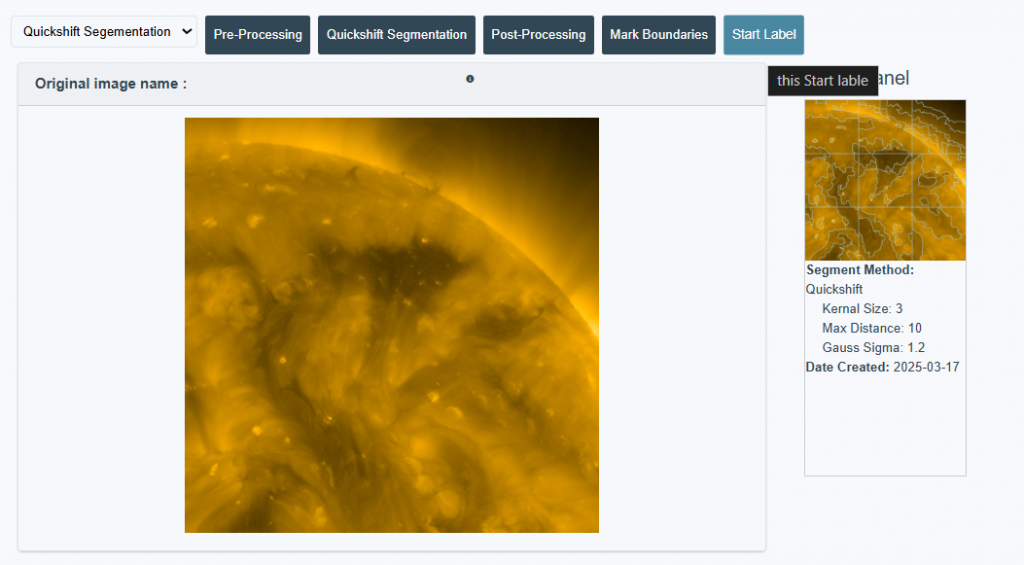
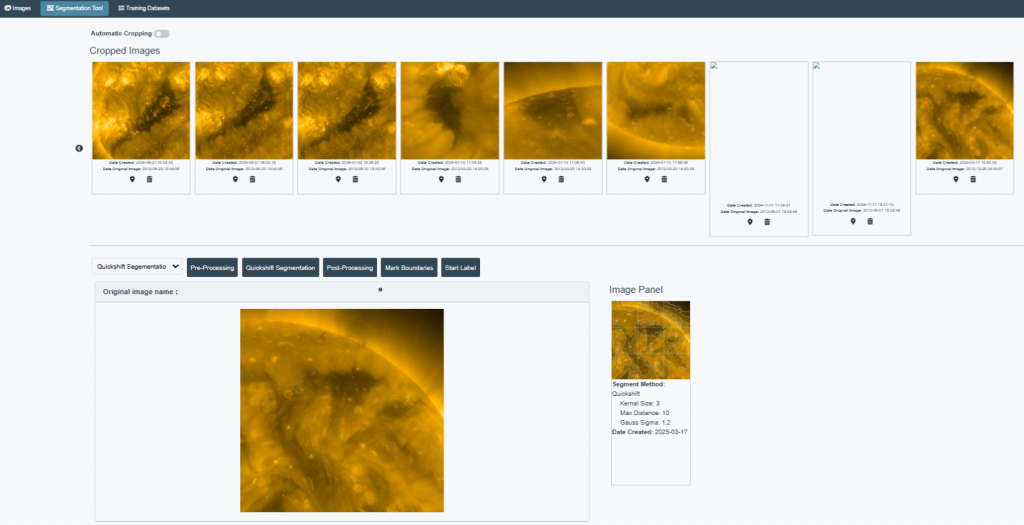
- Click on Segmentation Tool for creating segmentation.
- Once you open it, you will see an image of the sun with different color – coded areas.
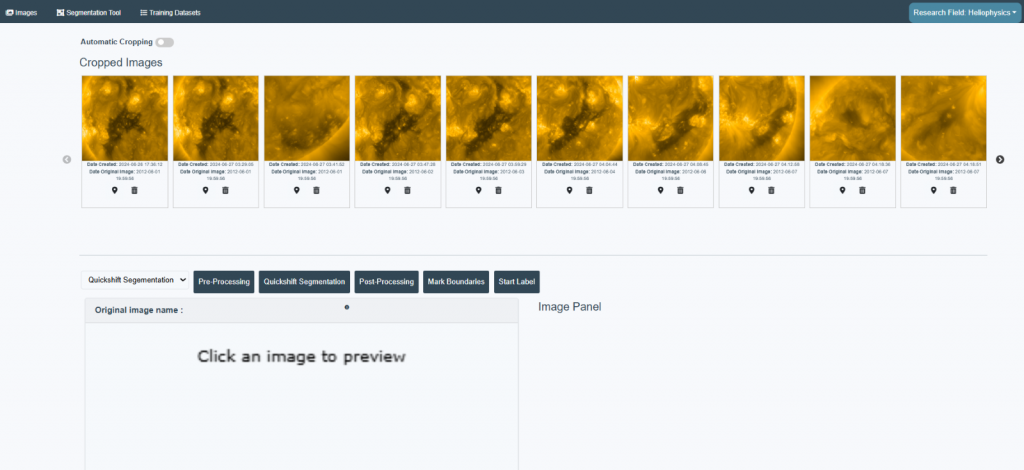
- Choose the cropped dataset which you want to label
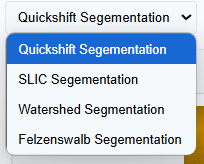
Choose segmentation method. Select one of the segmentation techniques:
- Quickshift Segmentation
- SLIC Segmentation
- Watershed Segmentation
- Felzenswalb Segmentation
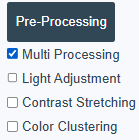
- Apply Pre-Processing & Segmentation
- Enable Multi Processing for faster processing.
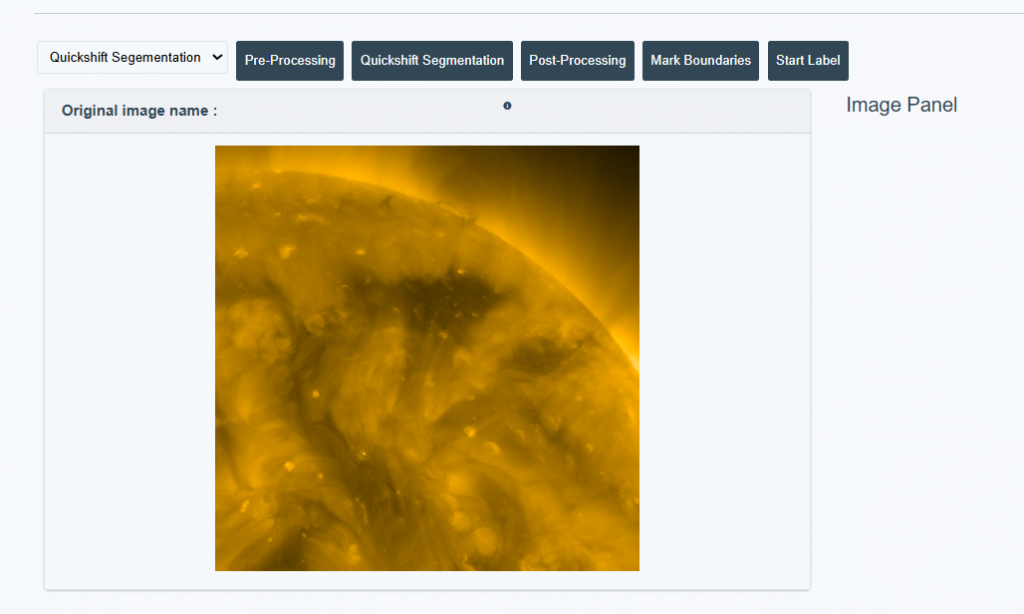
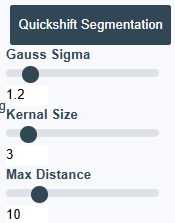
Adjust segmentation parameters:
- Gauss Sigma for smoothing
- Kernel Size for region size
- Max Distance for merging threshold
- Apply Post Processing & Boundary Marking
- Enable Region Merging and set Merging Threshold.
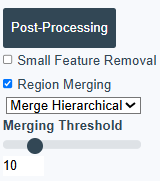
- Click on Mark boundaries to highlight segmented areas.
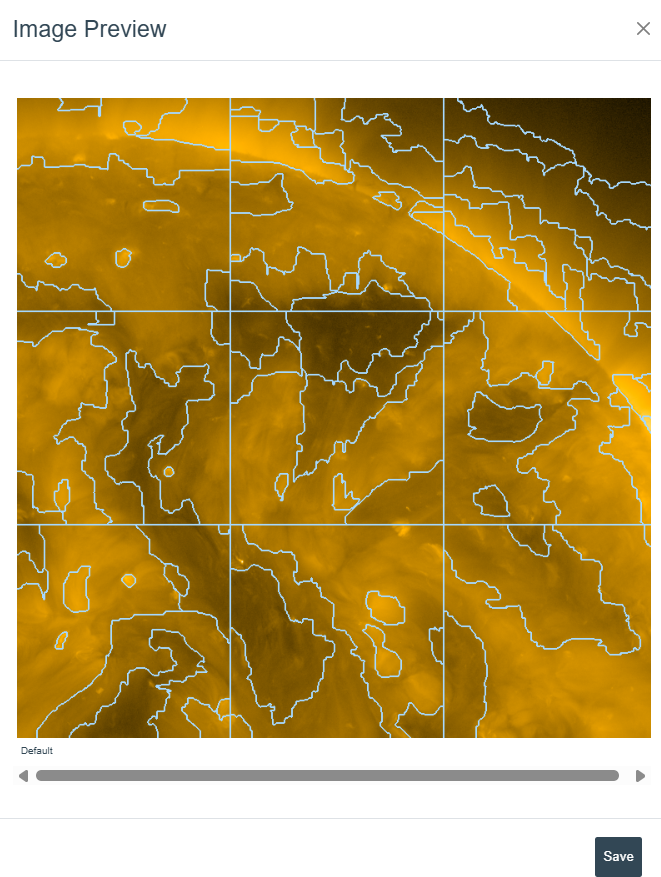
Save Segmentation:
- Preview the segmented image.
- Click Save Segmentation to store the labeled data.
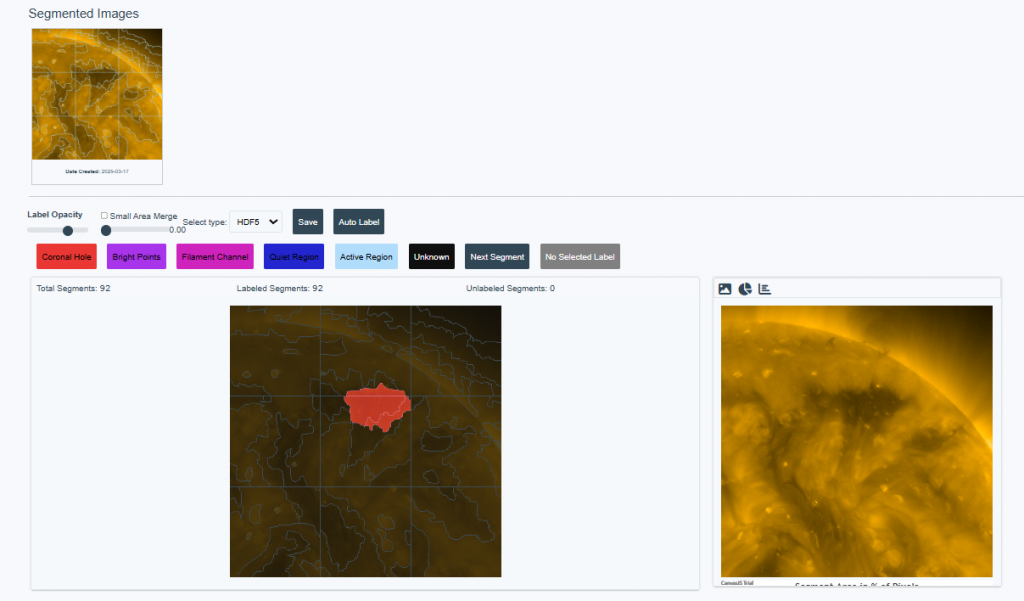
![]() 2.3 Applying the Label to an Image
2.3 Applying the Label to an Image
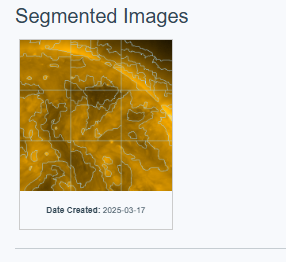
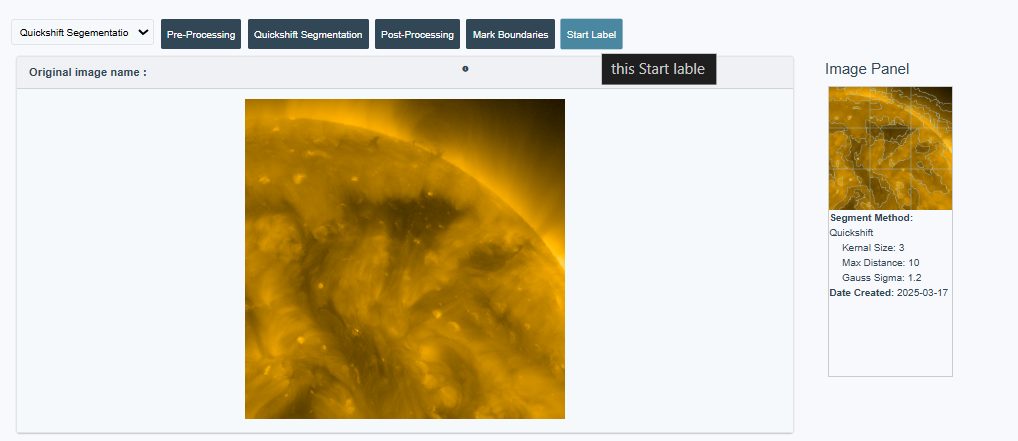
- Click on Start Labeling to begin the labeling process.
- Select the segmented image where you want to apply labels.
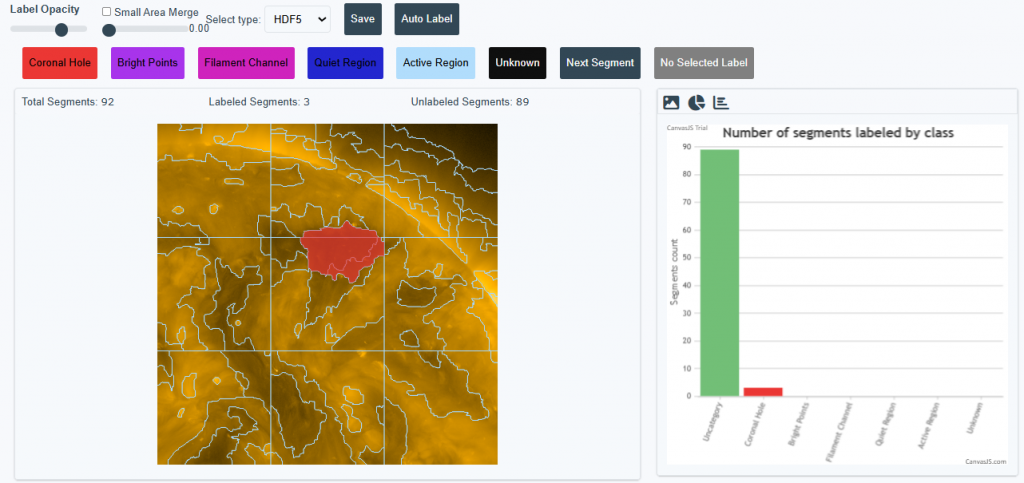
There are different label options available, such as:
- Coronal Hole highlighted in red.
- Active Region highlighted in light blue.
- Filament Channel highlighted in pink.
- Bright Points highlighted in Purple.
- Unlabeled areas highlighted in black.
Select the appropriate label type before applying it to the image.
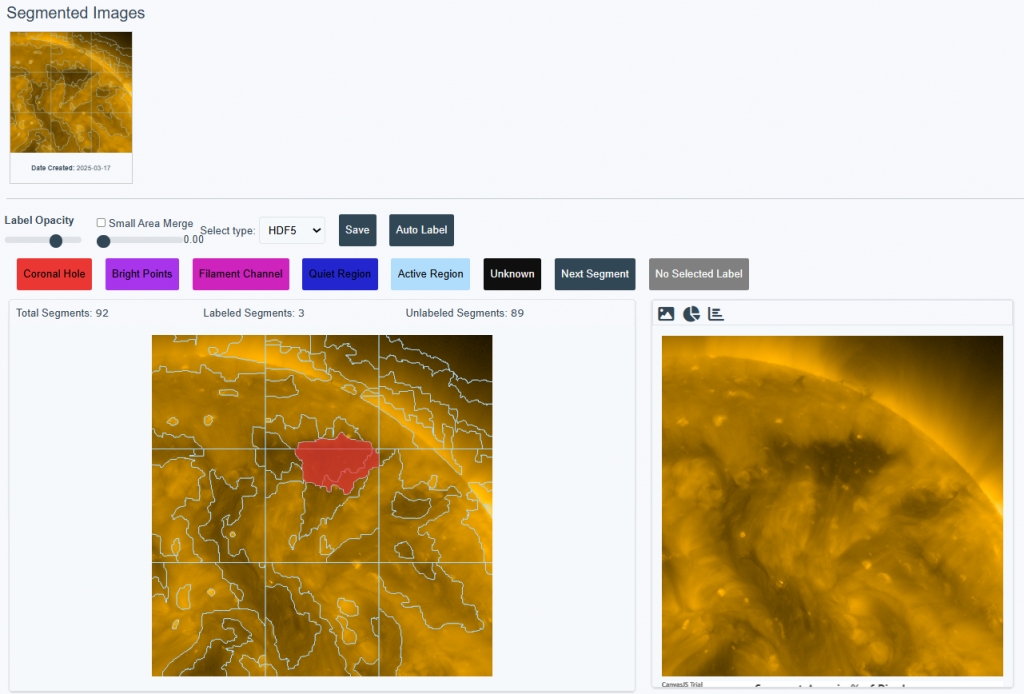
The tool will highlight the labeled areas. Next to the labeling system, you can see:
- The total number of segments in the image.
- How many segments are labeled.
- How many segments are still unlabeled.
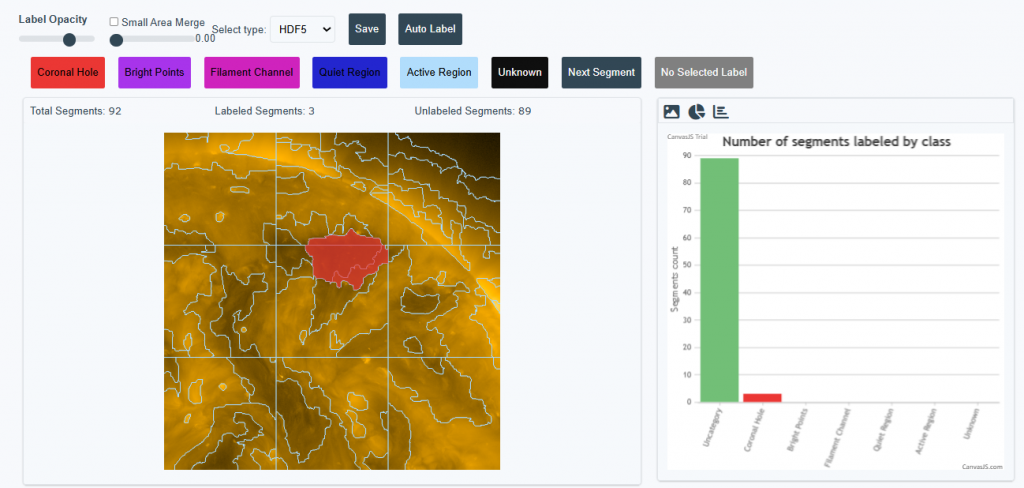
- If you want to make changes, you can click on a labeled area and update it
![]() 2.4 Automatically Labeling Images
2.4 Automatically Labeling Images
If you don’t want to label images manually, you can use the automatic labeling option.
- Click on Auto Label.
- Adjust the Probability Threshold.
- Choose a model (for example, Random Forest) for automatic labeling.
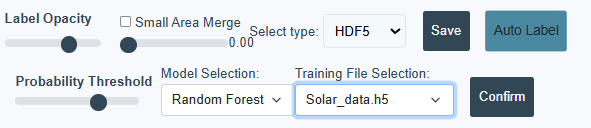
- Click Confirm to start the process.
- Review the automatically labeled image to ensure the labels are correct.
![]() 3. Saving and Checking Labeled Data
3. Saving and Checking Labeled Data
Once labeling is done, the images are saved so that they can be used for training.
![]() 3.1 Save the Labeled Images
3.1 Save the Labeled Images
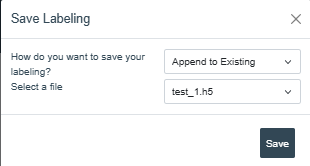
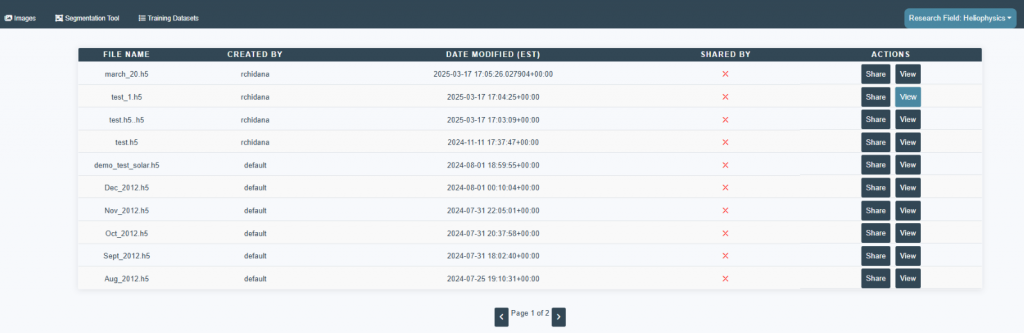
- Find the Save button.
- Click it to save all the labeled images.

- Enter a file name with extension .h5 for the labeling (e.g., test_1.h5) to save the labeled dataset.
- Click “Save” to create a new labeled file and store the segmentation results.
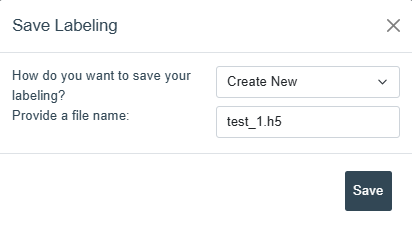
- The labeled images will now be stored in the system.
![]() 3.2 Viewing the Labeled Images
3.2 Viewing the Labeled Images
- Go to the Labeled Image View section.
- You will see small preview images of the labeled data.

- A pie chart will show:
- How much of the image has been labeled as coronal holes.
- How much is still unknown or unlabeled.
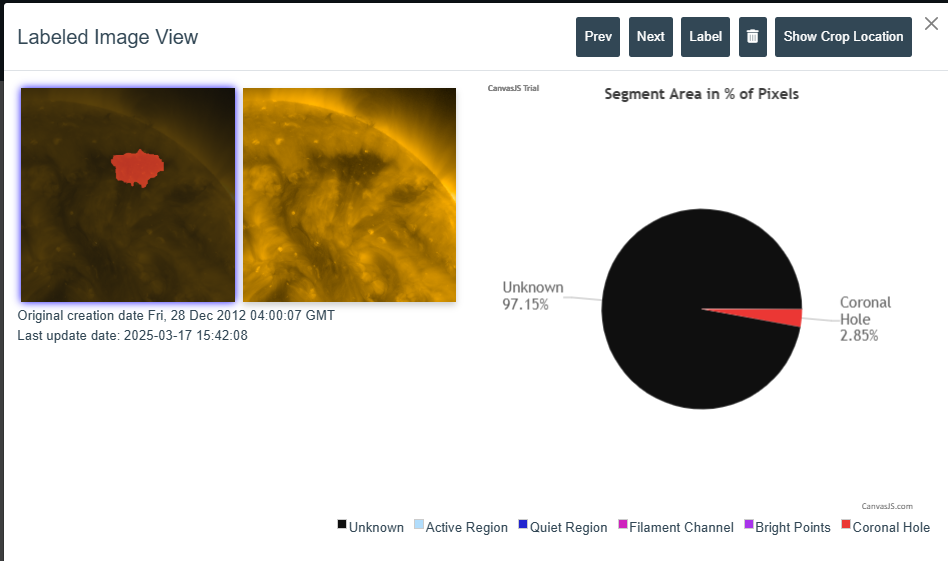
If you notice any errors, you can go back and adjust the labels.
![]() 3.3 Relabeling incorrect data
3.3 Relabeling incorrect data
- If labels are incorrect Re-label the Data
- Go back to the Segmentation Tool.
- Select the image that needs to be re-labeled.
- Click on the Start Label button.
- Choose the Segmented Images that require re-labeling.
- Apply the correct labels to the respective segments
- Click save button for saving the labels in the existing file.